Archive for the ‘Other Vendors’ Category

Using Citrix Netscaler and Netscaler MAS 11.01 with Nutanix Acropolis Hypervisor

Friday, July 15th, 2016

Hi Folks,

if you want to use the Citrix Netscaler or the Netscaler Management and Analytics System 11.01 Build 47.14 together with the Nutanix Acropolis Hypervisor Platform, this is the way how you get it running.

  1. Download the Netscaler / Netscaler MAS KVM Version
  2. Extract the Arcive(s) with a tool like 7-Zip until you have the virtual HDD (Netscaler = .raw file)
  3. Login to the Nutanix Web Console and open the Image configuration, import the virtual HDD as harddisk. Prefer to use the Mozilla Browser for this task, IE may crash regarding that the file is to large.
  4. Create a new VM, remove the CD-ROM (!) and configure the VM min. like below:
    – 2 CPU’s with 1 Core
    – 2GB RAM for Netscaler, 8GB RAM for Netscaler MAS
    – Add the imported HDD by using the Nutanix Image Service as IDE drive, the Size should be min. 20GB for Netscaler and 500GB (!) for Netscaler MAS
    – Add a Network Card
  5. Before you start the VM open a telnet client like Putty and connect to any Nutanix Controller VM (Default login User: nutanix Password: nutanix/4u)
  6. Execute the following commands:
    a) acli
    b) vm.serial_port_create “<VM Name>” type=kServer index=0Replace only <VM Name> with the Name of the Virtual Machine you have created, the commands will add a serial port to the VM, without a serial port the VM will NOT boot.
  7. Start the VM
  8.  To perform the initial Setup perform the following steps by using the Acropolis VM console:
    a) Login with user “nsroot” password “nsroot
    b) For Netscaler execute the command “config ns
    c) For Netscaler MAS execute the command “shell” followed by the command “networkconfig
  9.  Have fun with the rest of the configuration… 😉

Cheers
Michael

Nutanix Akropolis (AHV) support for XenDesktop/XenApp 7.9

Thursday, June 9th, 2016

Hello Folks,

as you may already note, XenDesktop/XenApp 7.9 was released and it’s now comes with support for the Akropolis support from Nutanix.

To get your Nutanix installation working it’s important to know that you have to install the “NutanixAcropolis-MCS-XD7.9_or_later.msi” provided by Nutanix (Nutanix Portal->Tools) on all of your XenDesktop/XenApp 7.9 delivery controllers.

The Software was released today, the old Version does not work with the MCS and your Akropolis Hypervisor must be Version 4.6.1.x or higher!

The installation is quite simple and the manual provided by Nutanix works well, one important thing (i run into this issue)… It’s not enough to create a Master VM! You must take a snapshot and the snapshot name MUST start with “XD_” so like XD_TS_Master_2012R2_Snapshot. Otherwise the snapshot will not be recognized during Machine Catalog Setup creation in Citrix Studio.

It’s quite simple, so if you run already a Nutanix or Citrix environment this is what you’re looking for.

Cheers
Michael

cloud-client.info will discontinue support for current IGEL Hardware and will add Google ChromeOS

Friday, March 6th, 2015

Hi Folks,

rearding the fact that we doesn’t have any current IGEL Hardware like the new UD6 or UD3 we will not provide any information’s or faq’s for these devices in the future and all related hardware whitepaper’s are discontinued. Please do not contact us if you have questions related to these devices because it’s not serious to provide information’s or help without any way to reproduce.

We’re also currently investigating  the Google ChromeOS to put some attention on this OS. Citrix has announced a partnership with Google and also Clients from VMWare and 2X are available incl. a management solution; so this one could be an intresting cloud client OS for road workers. For us important are the limitations and differences between the ChromeOS clients and the Windows/Linux/MacOSX clients. If you have already some experience with the Chrome OS we will be happy if you share some daily use experience with us incl. how updates are handled thru the different hardware vendor’s (the main gap for Google’s Android OS).

Cheers

Michael

News from Superfish (aka Lenovogate)

Tuesday, February 24th, 2015

Hi Folks,

last week we posted two articles related to the Superfish Adware which came pre-installed with some Lenovo devices produced in the last Quarter of 2014. Superfish contains strong security concerns regarding the used SSL interception technology coming from an other Company calling Komodia.

It seams that this will now run into a or better several (i know already about two) class action lawsuit in the US against Lenovo, read also the article at PCWorld. I hope this will be a warning for other Hardware vendors pre-installing software without any sense or effective use for the user and without any real security verification.

Lenovo has already published a uninstall tool (Read also here), also some Virus remove tools like Avast or Microsoft Defender will remove it (or try to do it). In any way you should verify the local Computer Certificate Store to be sure… Also Lenovo released an open letter here.

There is also other Software available which uses the Komodia SSL interception technology incl. a Trojan, there is a really good article available at Facebook by Matt Richard(Facebook Securtiy Team) here and i recommend to read it if you have to do or are intrested with/in IT Security.

If you want to perform a check to verfiy that you’ve not any SSL interception software installed try out this site: Badfish check

You’re using Firefox and Chrome/Internet Explorer? Don’t forget to open the Website above with Firefox and also Chrome/Internet Explorer.

Cheers

Michael

Security: cloud-client.info domain blacklist

Monday, February 23rd, 2015

Hello Folks,

like already mentioned in our blog registration form we will publish domains which are used by spam bots, malware and virus senders and/or domains where users perform suspicious actions against our websites.

So here is our first list called “domains_we_dont_like” containing 643 domains (collected by our websites in the last 12 months), you can use this list as blacklist for mail servers or to protect other webhostings/services. We do also allow the use of this list for other security related use and to prevent these actions in the future. Please note: There are also a couple popular email providers like GMX, Yahoo or Hotmail in the list, as long these mail provider can’t prevent the massive misuse of there services we have no reason to remove these providers from the list. All listed domains are used a couple of times for different suspicious activities, if you are responsible for one of these domains and you want to be removed you can get in contact with us to discuss how you can be removed from the list.

The list will updated from time to time.

Cheers

Michael


Lenovo released a Superfish uninstall tool

Saturday, February 21st, 2015

Hi Folks,

after big public concerns against the Superfish pre-installed tool coming with some Lenovo End Consumer product’s, Lenovo now released a tool to fully remove the Superfish Adware.

You can download the software from the Lenovo support site here.

I strongly recommend to perform the uninstall as soon as possible, the root certificate is already hacked (CA Private key password: “komodia”) and this means it’s now quite simple to create or be a victim of a man in the middle attack by using this certificate anymore.

Cheers

Michael

Warning: BYOS-Bring your own Sh**! …and why Lenovo now was a Adware distributor. (Updated)

Thursday, February 19th, 2015

Hi Folks,

can your users work with there own device (Laptop/PC/Tablet) in your company environment or have access  to your company environment from home?

Than you should look out for new Lenovo End-Consumer devices! Why?

Lenovo seams to have some fun to add a software called “Superfish” to there harddisk images, so why this is now a security concern?

First of all Superfish can be called a Adware, the software will add a component to Webbrowsers like the Firefox, Internet Explorer and Google Chrome. This by default is already a pain in the a*s but to make it even worser. Superfish will add an own thrusted root CA certificate to the certificate store and this means it’s possible to perform a man in the middle attack for all certificate based SSL communication; like Facebook, Online Banking, Remote Desktop Gateway access or your companies Netscaler incl. the related ICA traffic. This will affect the Google Chrome Browser and the Internet Explorer, Firefox comes with an own certificate store and doesn’t use the Windows Certificate Store. There is also a nice article describing how Superfish deals with certificates here (expand the pictures in the top post).

So i strongly recommend, if a user came up with a “new” Lenovo device that you should force him to allow a device review.. Uninstall Superfish (some Virus Scanners like Avira incl. the certificate or Malware Tools can do the job, just use google) and remove all thrusted CA Certificates which belongs to Superfish Inc or even better: Read out the Windows activation Key incl. Office and wipe the damm system (My prefered way… 🙂 ). Removing CA Certifcates can be tricky read also here, but this is the most important part.

Somewhere in January Lenovo has stopped to deploy Superfish but regarding what i read until now it’s only on-hold and not finally stopped, so this shi**y software can be delivered again. So customers should now “force” Lenovo to stop this in the future, don’t forget that there are also other vendors available.. Be also aware: Lenovo has stopped this in January and affected devices can still be sold in retail stores.

There is already a statement available from Lenovo (Source(Parts in German) ):

“Lenovo removed Superfish from the preloads of new consumer systems in January 2015. At the same time Superfish disabled existing Lenovo machines in market from activating Superfish. Superfish was preloaded onto a select number of consumer models only. Lenovo is thoroughly investigating all and any new concerns raised regarding Superfish.”

Background information on Superfish

Superfish was preloaded onto select models of Lenovo consumer products only and is a technology that helps users find and discover products visually. The technology instantly analyzes images on the web and presents identical and similar product offers that may have lower prices, helping users search for images without knowing exactly what an item is called or how to describe it in a typical text-based search engine.

The Superfish Visual Discovery engine analyzes an image 100% algorithmically, providing similar and near identical images in real time without the need for text tags or human intervention. When a user is interested in a product, Superfish will search instantly among more than 70,000 stores to find similar items and compare prices so the user can make the best decision on product and price.

Superfish technology is purely based on contextual/image and not behavioral. It does not profile nor monitor user behavior. It does not record user information. It does not know who the user is. Users are not tracked nor re-targeted. Every session is independent. When using Superfish for the first time, the user is presented the Terms of User and Privacy Policy, and has option not to accept these terms, i.e., Superfish is then disabled.

The statement is one of the funniest i ever read… Superfish is a miracle software, it can help a user to find and discover products without monitoring the user = Pure Magic? ..or who should believe this? How do you call a real time image recognition and a software that can intercept and sneak into certificate trusts? A glorious present for all Hackers and intelligence agencies! Did anyone from Lenovo read the Superfish “Privacy Policy”?

Superfish will collect and store certain information that is automatically collected by WindowShopper or provided by its users, such as download date, status changes, usage logs, email address. Such information will be kept private by Superfish and is not for public distribution.
Superfish will also store bugs hunting information provided regarding the service. This information is for Superfish’s internal use only and will not be distributed under any circumstances.

Ok… So what do you call “It does not profile nor monitor user behavior”?

Lenovo is a strong canditate for our “That sucks!” Award now. Bloatware or other useless pre-installed crap like a lot of vendors do provide is one thing but a pre-installed Adware containing strong security issues/concerns is a new dimension how hardware vendors tread customers. Today and in the mixed environments it’s also not important if the device comes as “End consumer” or “Enterprise” device.

Update: I just got a new statement provided thru the Lenovo Website here. Most important is the part: We will not preload this software in the future. Lesson learned.. But please remember, there could be still affected devices available in stores and the time period Lenovo “provided” Superfish is estimated with ~3 months.

Cheers

Michael

Next Thin Client/Zero Client Vendor NComputing on the way to be part of an other company? (Updated)

Monday, February 9th, 2015

Hi Folks,

in the last 10 years a couple of thin clients vendors are gone.. Mostly acquired by other companies.

Neoware (US) was bought by HP…
Wyse (US) was bought by Dell…
Pano Logic (US) was… I don’t know how this can be described.
Sun Microsystems (US) was bought by Oracle and discontinued the Thin/Zero Client business.
Liscon (Austria) moved/changed to Stratodesk…

Now the next larger Thin Client Vendor “NComputing” seams to struggle, as mentioned in the Silicon Valley Business Journal here: NComputing in Santa Clara put on the block after troubles and in the San Jose Mercury news here: Santa Clara’s NComputing is for sale and in deep financial trouble. So in the upcoming weeks we will see what will happen to NComputing.

Cheers
Michael

Video (Updated): Open the Archos Cesium 80 Tablet

Friday, January 16th, 2015

Hello Folks,

here is a new video that shows how to open the Archos Cesium 80 Windows 8.1 with Bing Tablet based on the Intel Atom Processor Z3735G.

I needed to open the tablet to fix an issue with the Audio Playback (noise during playback but no sound with Realtek I2S/Intel SST Audio Device) thru the speakers (headset did always work), after i tried several drivers (really a lot… 🙁 ) the only thing that helped me was to disconnect the battery from the mainboard. Of couse it could also be a driver issue but as written, other driver versions (older and newer) or the default drivers coming with the pre-installed Windows did never fix it for me.  Some forum articles recommend to change some BIOS settings to fix the issue but the Archos Cesium 80 BIOS is very limited and don’t offer any relevant configuration.

Maybe the same procedure will fix this “playback via speaker” issue also for other Tablets using the Intel/Realtek combo. There can be found a lot of user descriptions mentioning similar issues with other Tablet’s and Vendor’,s but i can’t guarentee that this solution will also work for these issues.

To watch the video click here.

It’s also sad that a bunch of tablet vendors incl. the chipset producer’s Intel and Realtek do not offer driver downloads incl. recovery images (Tablet Vendors only) related to these products. A Windows x86 or 64-Bit Tablet is not a Android Tablet where the user can not “wipe” a driver, how long will it take until a few vendors will notify this? Take a look on Acer or Asus, these vendors offer recovery ISO’s for there products by default (it’s maybe not easy to recover a UEFI based Tablet for the typical user but a recovery solution is still available at all).

Update: I just want to add that the power supply coming with the device is crap at the moment, as example you will get issues with the touch input if you try to use the tablet during the charge of the battery. So i strongly recommend to use any other power supply or a regular PC to charge the battery.

Cheers

Michael

P.S.: Of course this video comes without any warranty!

Tip: How to open the Emdoor EM-18270-D Windows 8.1 7″ Tablet

Tuesday, December 30th, 2014

Hi Folks,

here is a short video how to open the Emdoor EM-18270-D Windows 8.1 7″ Tablet, the quality could be better but I made the video with only one shot during the launch break with my mobile. You don’t require any tools for the task… 🙂

How to open the EM-18270-D Tablet Video

Cheers

Michael

Tip (Updated): Getting Drivers for the Emdoor 7″ EM-18270 Windows 8.1 Tablet

Monday, December 29th, 2014

Hi Folks,

maybe you noticed that 7″ Windows 8.1 (with Bing) Tablets are available now very cheap… The cheapeast one is the Emdoor EM-18270 Tablet but in this case cheap means not cheap.

I got one of these tablets and iam very happy with it, it’s a Emdoor EM-18270 Tablet, this tablet is available for less than 100€ and comes with Windows 8.1 with Bing, a one year Office 365 subscription and offers a Micro HDMI, USB and SD Card extension incl. 2×2 MP Cameras incl. Bluetooth 4.0 based on a Intel Atom Z3735G (Baytrail) platform.

The tablet is available in different revisions (EM-18270 seen in the UK as Linx 7″ Tablet or EM-18270-D seen in Switzerland as Surf 7 Tab), there are only two differences i notified: The UK Version is partly available with a 32GB internal e-MMC the Swiss Version in general comes with a 16GB internal e-MMC also the UK Version comes with a plastic instead a metal case which comes with the Swiss Version.

Update: In the US/UK a similar device can be seen as Cube Iwork7 (U67GT), it seams to be the same device based on a EM-18270 but i got this only as report and I was not able to verify this on my own.

For my Swiss Version i tried to optimize the e-MMC/SSD usage, 16GB is not very much and in the default Version there is only ~1GB HDD space available, enough for surfing but to less for working. 🙂

So i wiped the e-MMC and re-installed a regular Windows 8.1 x86 incl. Office (you should enable Office 365 thru the device before wiping the e-MMC 😉 ), compressed the Windows winsxs (script can be provided on demand but on your own risk) and c:/Program Files folder and installed/moved Office 365 by using symbolic links to a fast SD-Card in the slot.. (Microsoft is still not able to provide a simple target selection during the installation for Office 365). Now i got ~5GB free space for the e-MMC and a big issue.. Where do i get the damm drivers for the hardware? Emdoor do not provide any recovery media or driver packages on the website.. Very weak by Emdoor but after a lot of research i found an article here: Article . The drivers for the Linx 7″ incl. the Kionix G-Sensor are working like a charm (don’t forget to install the registry file for the Kionix G-Sensor with Administrator permissions).

So i would really like to thank the author for providing the drivers in a simple way! If you also got the Emdoor Tablet this download is a must have for future recovery and maybe Emdoor should re-thing the way how “support” is provided to customers. The device itself is great but it doesn’t help if you can not recover or reinstall it and not all people do like the “default” installation coming with the device (like me). It should not be so hard to provide simple driver downloads…

Important: Do not perform a new installation without a Windows 8.1 installation media and a valid Product Key, do not wipe the partition without this! You will not get a Windows 8.1 with Bing installation media from Microsoft or the hardware Vendor! You also have to use the x86 Windows 8.1 Version, the 64-Bit Version will not fit on the 16GB e-MMC harddisk.

Cheers

Michael

P.S.: I did not try to install the Linx Bios on a Surf 7 Tab, the BIOS coming with my device is only a few days older than the Linx one but don’t come with the Linx icon. So i can not say if this works or not, i used only the drivers…. You should also get the Windows OEM Key from the BIOS in advance by following these instructions Get OEM BIOS Windows Key

Tip: Optimizing WD My Cloud NAS drive Part2

Monday, September 1st, 2014

Hi Folks,

let’s continue possible optimization for the WD MyCloud NAS drive. In the last part we killed not really needed  services which consumes a bunch of CPU resources but there are still some other services that could be skipped.

First of all i don’t have any Apple devices in my environment and already disabled the itunes server and Time Machine Mac-Backups  in the MyCloud configuration but still there is a netatalk (Apple network communication) service running.. Why can i not configure this in the WD GUI?

So we need putty again…

Like in Part 1 you have to open a SSH connection to the MyCloud, proceed with Step 1 to 3 from Part 1.

1) To stop the “netatalk” Apple network service enter the following command: service netatalk stop

2) If you want to “stop” it after a reboot enter: crontab -e

3) Scroll down in the shown editor and add as last “new” line the command: @reboot /bin/sh /etc/rc2.d/S50netatalk stop

4) Press ctrl-x -> y -> enter to save the changes


Next point… WD has enabled IPv6 in the used Debian distribution, what a nonsense! You can’t configure it, you can’t use it but still it’s enabled and consumes network resources (doesn’t matter if used or not, it creates IPV6 related traffic at anytime if enabled). Yes, this is no joke! So let’s remove it.

To disable IPV6 follow the steps below:

1) Connect thru the SSH console

2) Enter the following command (use copy and paste to enter the command in putty, it’s one line of code!), this disables ipv6 on demand:
echo '/sbin/ifconfig eth0 inet6 del `ifconfig | /bin/grep "Scope:Link" | /bin/sed -e "s/^.*addr: //" -e "s/ .*//"` '> /bin/disableipv6

3) Enter the following command, this modifies the permanent ipv6 configuration (it’s one line of code):
echo "echo 1 > /proc/sys/net/ipv6/conf/all/disable_ipv6" >> /bin/disableipv6

4) Enter the following command: chmod a+x /bin/disableipv6

5) Verify the script, enter ifconfig and verify the ipv6 address shown for the eth0 adapter. Now execute the disableipv6 command and verify with ifconfig that the ipv6 address is gone for eth0. If the ipv6 address is not gone or you received an error check the script with nano /bin/disableipv6

6) If the ipv6 address was gone after executing the disableipv6 command execute crontab -e

7) Scroll down in the shown editor and add as last “new” line the command: @reboot /bin/sh /bin/disableipv6

8) Press ctrl-x -> y -> enter to save the changes

9) Reboot the device by using the reboot command


Please note, other options to disable IPV6 will be overwritten by the WD configuration tools so you have to use this way. Step 3 is required to modify the default configuration which will be overwritten during bootime by WD configuration tools, it’s required regarding the fact that some services/configurations might restart the network services and in this case the previous on demand deactivation will not work anymore. So we need two ways to prevent ipv6. 🙂 Also if you are using ifconfig you will see that the dropped RX frames will increase, this is by design and counts ipv6 frames from other devices in the network which can not be handled anymore and it’s not critical.

Reboot the device to take over the network configuration, after the reboot connect via SSH and enter the command ifconfig to verify the result but wait some time, it maybe take a while until all cron commands are executed.

These two steps will also increase the performance again and should be used with the configuration done in Part 1 of the WD MyCloud optimization article.

Results so far:

With my two 3TB WD MyCloud drives i was able to increase the performance for writing a large file from max. 2-6 mb/s up to max. 70-90 mb/s. This could be reproduced with both drives, both drives currently host more than 30.000 files for tests, mostly images coming from misc clipart collection DVD’s and own pictures. Important: Before you copy a large amount of files make sure that the DLNA Database update service is not running, this can be checked quite simple in the WebGui -> Settings -> Media -> Last refresh. If last refresh shows “running” wait until it finished. As already written i will look out for an alternative DLNA solution but this will be a future step. Tip for the WD Support and R&D Team: If you try to reproduce customer issues try to fill up the HDD with 30.000 or more files hosted in the public default shares, otherwise you will not see any issues and it’s quite easy to blame customers for there network without any real reproducing. Iam quite sure that the weakness of the software is known at WD and it doesn’t make sense to have a 2,3 or 4TB NAS to only save a few large files… Nobody will do this and use the device in this way.

Cheers

Michael

P.S.: Like everytime no warranty from my side, iam not responsible for any damage or the loss of warranty related to the provided tweaks.
Tip (Updated 2): Optimizing WD My Cloud NAS drive Part1

Thursday, August 28th, 2014

Hi,

are you using a WD My Cloud NAS drive with a couple of files on it, like pictures or what ever? Did you get a “ultra” poor performance if you transfer new files to it or a “worse” performance in the online GUI? You got connections drops thru FTP, SMB or cloud access?

Of course the WD Support will tell you it’s a bad network cable, a bad LAN/WiFi or worse router configuration but mostly it’s poor development on the highest level done by WD! To much features, bad development and a weak hardware is a really bad combination; the result is called: WD MyCloud.

Want to check it out? Ok.. Try this (iam using Firmware v04.00.00-607 at the moment):

1) Open the WD My Cloud Web Interface and enable in the Network configuration settings the SSH console, this can take some time regarding the increddible bad performance that could be possible.. Reason later.

2) Download and install putty from www.putty.org or use any other SSH client/terminal.

3) Connect to the WD My Cloud with putty, username is by default “root” with the password “welc0me” (o = zero in welcome).

4) The next step can have a impact on the warranty.. Two ultra poor developed services are running at the WD MyCloud to create thumbs of the files on the NAS if possible. These services seams to be very very very slow depending on the amount of files on the my cloud and causing mostly all effects like slow communication/gui or network drops. It doesn’t matter if you have the “public” WD Cloud feature enabled or not.. These services are running all the time and consume all the CPU resources without any sense. So enter the following commands to stop this madness:

/bin/sh /etc/rc2.d/S86wdphotodbmergerd stop
/bin/sh /etc/rc2.d/S85wdmcserverd stop

Don’t log off from the SSH console now!

These services are not really important. If you are using the WD online cloud service, you will not get thumbprints for your pictures anymore but this is still better than can’t access anything at anytime and have a NAS performance like using a old 14400 bps analog modem or sometimes 300 bps thru a bad wire… 🙁

Now try to copy some files to the MyCloud.. It should be much faster and also the web front end should not show any big performance issues anymore. If you can verify the result you can disable the services until the next firmware update arrives with the next step.

5) Disable the crap… This should work until you update the MyCloud to a new firmware version. Enter the commands exactly like written below incl. the #:

# update-rc.d S86wdphotodbmergerd disable
# update-rc.d S85wdmcserverd disable

Update 2: It seams to be that some other script enable the services again.. So here is an alternative solution.

a) In the SSH session enter: crontab -e
b) In the editor scoll down (arrow keys) a little bit and enter the following lines exactly as written as new lines:
@reboot /bin/sh /etc/rc2.d/S86wdphotodbmergerd stop
@reboot /bin/sh /etc/rc2.d/S85wdmcserverd stop
c) Press ctrl+x -> Y -> ENTER

6) Done, you can reboot the device now to verify the results.

Also you can open the twonky server running at the MyCloud (http://*wdip*:9000) and set the rescan intervall for multimedia files in the twonky server advanced settings to 12 hours = 720 minutes (of course it could be less, depends how fast you need a refresh for the streaming service).

Do also not believe that the final result will be now a “ultra fast” NAS, the hardware still is weak in general and there might be much more “crap” code running at the MyCloud but it will be much more better than before.

I really like WD products but i have no clue how WD could sale/release some crap like this or to not offer an option to disable these or maybe other bad services by the regular web gui. Most people don’t need it.. So why not start to develop a good NAS and not the most worse NAS i ever got.

Want more optimizations for the MyCloud NAS? Look here


Cheers

Michael

P.S.: Of course iam not responsible for any damage or the loss of warranty by using SSH commands together with the WD MyCloud!!!

Info: Root any Android Device, towel root demonstrates the weakness of Android and the crappy update handling from Vendors

Tuesday, June 17th, 2014

Hi Folk,

do you have an Android Device and you thing it’s secure? You’re mostly wrong!

By using a Kernel weakness of nearly all current Android devices with a firmware build date before 06/2014 towel root allows to root a lot of these devices. Ok, by default this is not a big issue but what happens if “other” Apps are using this weakness and start to implement “bad” code into your device without your knowledge? Do you get a Update for you Samsung Galaxy S4 or maybe an other device? Mostly not because Android devices are “throw away” devices for the most vendors.. Every year a new device, update “who” cares? Security is not important as long the margin is okay, that’s the truth about nearly all Android device Vendors. ..and in the rare case that your Vendor provide a firmware update but you have to wait that all Mobile Providers in your region have to agree to a Firmware Update incl. for WiFi only devices like tablets: Good Night! (Hello Samsung! ..again.) Why should a mobile provider have an interest to provide you a “secure” device if you could buy a new one.

Just check it out, install the towel root apk file from the project site here: Towel Root Project Site and execute it, now click on “let it rain” and see what happens. What do you think? Will you note it if you run an other app the first time or do you thing the app could be corrupt?

Don’t misunterstood me, but this is a security hole that should not happen and Vendors should be “forced” to provide a fix for issues like this by law and for a minimum of two years after the last device of a series was sold. It also means for me that Android has no place in any business environment until vendors do not change there general update politics. I do like Android but i do not like what all the “cool” Vendors have done with it… Cheap stuff which is already outdated in the second where you buy it. If Apple, RIM or Microsoft will act with there Mobile OS in the same way everyone will be upset but for Android it’s okay? No, it’s not!

Cheers
Michael

Tip: Nice article how to setup a Nutanix environment with Microsoft Hyper-V

Wednesday, June 11th, 2014

Hello Folks,

i found a very nice article how to setup a Nutanix environment together with Microsoft Hyper-V here, maybe you will like it too… 🙂

Nutanix Hyper-V Cluster
Cheers

Michael

Tip: Detect a Nutanix Block thru Windows

Friday, May 23rd, 2014

Hello Folks,

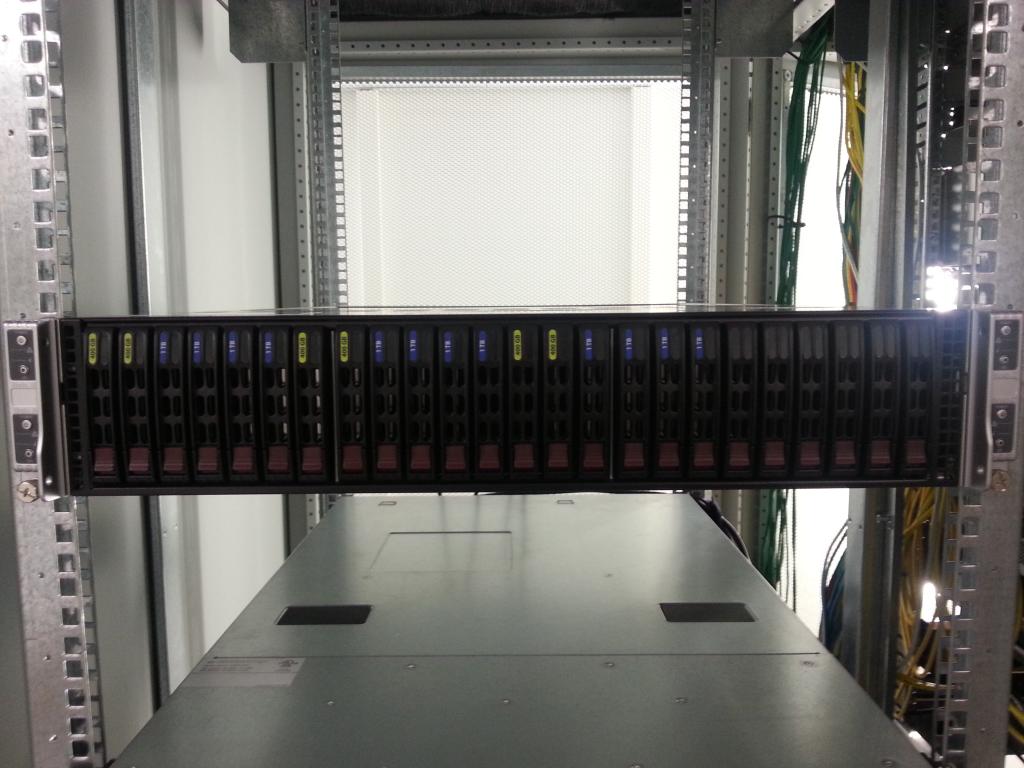
i just setup a new Nutanix Block (NX-3050) in our Democenter..

Nutanix


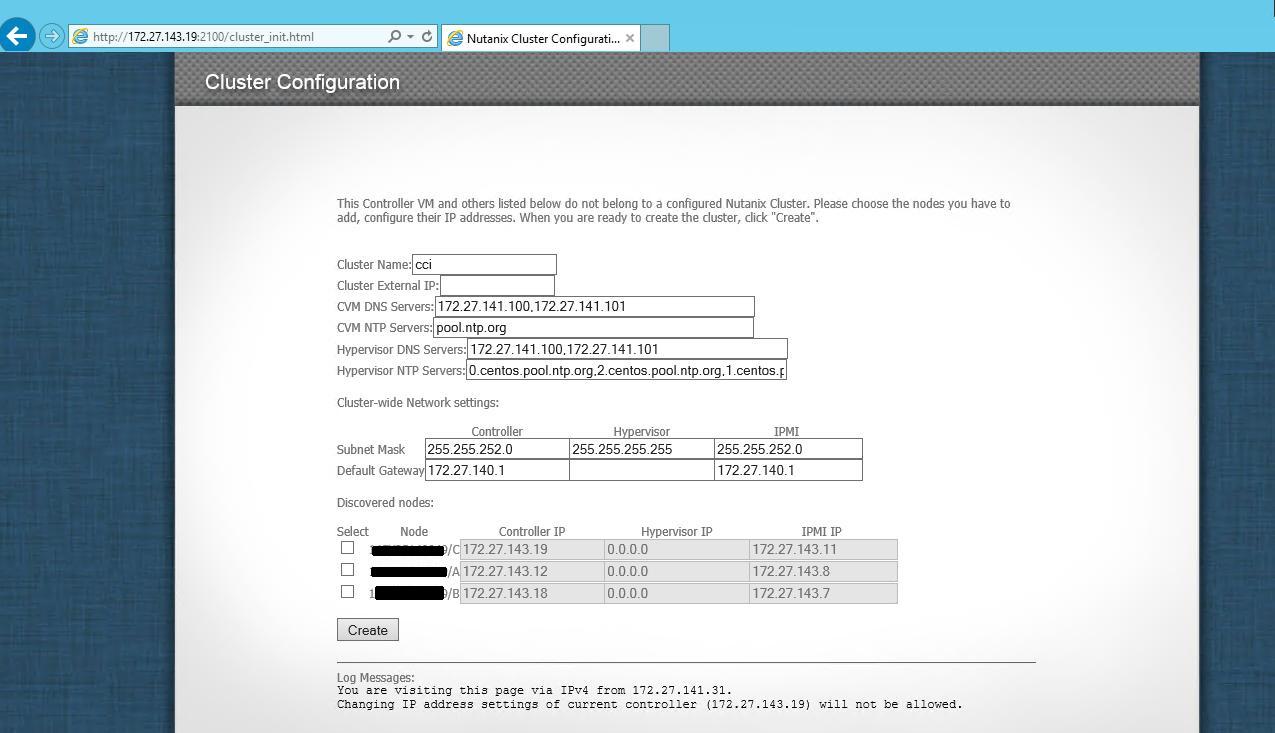
If you don’t have a Mac OSX (thru Bonjour) available and you want to detect the block in the Network you can do this thru Windows quite simple.

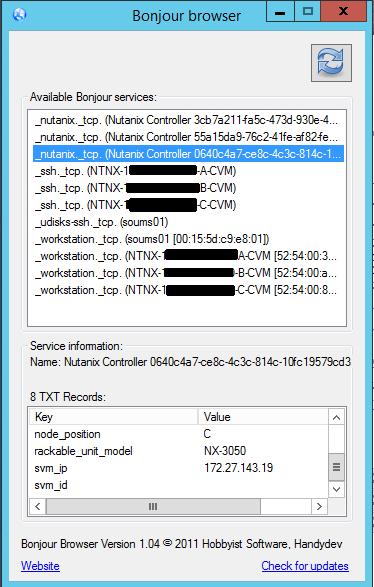
Download and install the Bonjour Print Services from the Apple Site (Download), this will not detect the Nutanix Block at all but you can add the Bonjour Browser which is a simple to use freeware tool from here (Download). Install the Bonjour Browser too and execute it, the Browser will now detect all devices in the network using the Bonjour Administration Service and you can now detect the Nutanix Block incl. all IP’s and SNr for further configuration in a very simple way.

BonjourBrowser

 Now you can configure the block by following the manuals, quite easy.. 😉

nutanixclustersetupn


Cheers

Michael

Info (Updated): USB 3.0 Memory – Same device with different results or what vendors doesn’t tell you.

Monday, April 28th, 2014

Hi Folks,

did you already got an USB 3.0 Memory or maybe two or more of them for you company? Your Users complain different write/read performance results? Why?
Reason is quite simple, it seams to be a big fun for some vendors to sale “different” devices providing different results with the same device name/part number. My negative sample for today is the Memory Vendor PNY and the Product USB-Stick 128 GB PNY Wave Attache™ USB 3.0 – Part Number FD128GBWAVE30-EF.

I got two of these devices for tests with the IGEL UD5 USB 3.0 Ports and the user was complaining different results with similar USB memory devices, so of course the different result must came from the Thin Client… 🙁 …but this is not the case. 🙂

I was able to reproduce these different results with PC’s, Tablet computer or any other device coming with a USB 3.0 port and the issue was not the thin client; it is the memory device.

The difference was “huge”, the first USB Memory provides a write speed of 60-80 mb/s which is good for a USB Memory but the second one provides only 25mb/s as max. write speed? What? It’s not much faster than a USB 2.0 device…

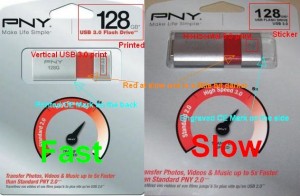
128 GB PNY Wave Attache, same but different

128 GB PNY Wave Attache, same but different

So i went to a electronic store close by that offers these USB Memory devices and both versions are offered here at the same time, funny but you can see the difference for this product quite simple if you know where to look (expand the upper picture).

Iam sorry to say: For me it’s a little bit “cheating” to work in this way… Provide the fast version for tests and sale “mixed” versions of the same product at the same time and i don’t believe that the production costs are equal. The slow PNY memory seams to be a “better refurbished” USB 2.0 memory and the results are not even close to the results mentioned in public available tests which can be found at Google or what PNY mentions on the package as max. speed.

So i only can recommend to test this in advance! If you buy a bigger amount force the reseller to provide you a “specification” guarantee and as end customer try to replace the device if possible, last one could be hard because the speed for the device is mentioned only “very” flexible by PNY and of course it’s a “low budget” device but a extreme result difference like this should also not happen for a “low budget” device with a brand on it from my point of view.

By this way, PNY is not the only vendor working in this way but regarding the fact that this device is “sold” and “announced” in a massive way at the moment you should have an eye on this.

I also wait for a statement from PNY and how this can be fixed, i will update this article if i got a statement from PNY and the marketing slogan “Make Life Simple” from PNY sounds like a bad joke for me at the moment but maybe there are people who like to play a device “lottery”.

 Update:

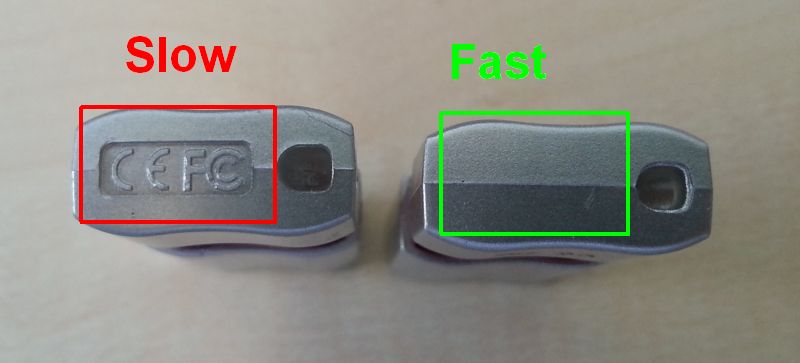
I found a 3rd Version and after this test results the best indicator to detect the fast Version is the engraved CE symbol, see picture below. The Version without the CE Mark provides a 3x faster write speed than the one with the engraved CE Mark during my tests. I’ve tested now 7 of these sticks (4 with engraved CE Mark and 3 without the engraved CE Mark), thanks also for the feedback provided by other users confirming these results! Also the slow one has a red LED, the fast one during my test always comes with an orange LED which shows Disk activity.

PNYUSB3SF


Cheers

Michael

P.S.: I will keep my two same but different PNY memory devices to have it as negative sample how “Same but not similar device” can look like.

P.S.2: I do not know how much versions are sold by PNY and this is only my personal result, so iam not responsible if there are also other versions with other visible indicators available. Test! Test! Test!

P.S.3: I got already similar results with display vendors (very common) and other devices like smart card readers but in these cases there was always a different revision number available (printed on the packaging and/or device) which clearly mentioned a difference.. This is not the case for the PNY memory device and i really try to find one.

Info: DynDns discontinue the free DNS Host Service

Monday, April 7th, 2014

Hello Folks,

not IGEL related but maybe it’s useful for you, DynDns will stop there free DNS name service in the beginning of may. If you’re looking for a free alternative, maybe to access labs try no-ip or similar.

Cheers
Michael

Tip: The Blue Bottle Flies of mobile computing or the billion Dollar business with faked SD-Cards

Monday, March 31st, 2014

Hi Folks,

this article is not a typical one and this is a topic i have in mind a couple of weeks now. Everyone is talking about mobile devices and you would a agree that Smart Phones or Tablet Computer are one of the main drivers in the IT at this time.

A lot of vendors are selling there products and accesories to use it with these mobile devices and if you look on the sales amount of 2013 (Source: Gartner) we have 195.000.000 Tablet devices and if you add smart phones (~500.000.000 devices) we have the amount of nearly 700.000.000 devices. Digital Cameras, MP3 Players or other devices using SD-Cards are not counted here… What do a lot of these device need to extend the memory? Yes, a SD-Card!

Of course a lot of these devices do also not support a SD-Card (like Apple devices) but still it should be around 350.000.000 devices. So if you look at these figures SD-Card vendors are really the big winners of mobile computing… …and if they produce cheap faked SD-Cards there are even more big winners.

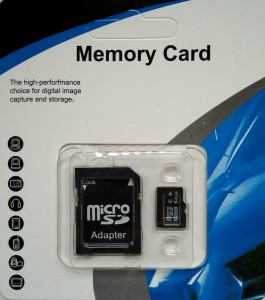
Faked Micro SD-Card sample

One sample for a typical SD-Card fake, all samples i got of these product were fakes..

I ordered a couple of samples from EBay, Amazon and other sources of the SD-Card type above… They all are cheap fakes not even worth the packaging fee’s.

But how does this trick work… It’s quite simple, the smart card itself is a working SD-Card of a size of 2GB or maybe 4GB (or even smaller/bigger). The SD-Card needs to know how much memory is available with the device and here starts the fake.. The 2GB SD-Card tells everyone to be a 32 or 64GB SD-Card. Simple hardware manipulation but a big win for the vendor. The profit is increddible and these SD-Cards are also sold very cheap (US less than 20 US$, Europe less than 20 € and similar) and the best for the cheaters.. It’s hard to detect a faked SD-Card, most customers will note it after weeks or months and then they often believe the cheap card is “broken”. Systems like Paypal or payment thru Credit Card do not work regarding the time until the user note this “issue”. Why?

The user will not note this “difference” until the real available space is fully used and the computer/tablet/smart phone start to access “not existing” areas. For example in Windows you will get a “semaphore error” message if this “not existing” memory starts to be filled up with data, also you can not format the SD-Card with a file system like NTFS and only fast format (like Smart Phones or Cameras mostly do) do work without any error message.

There are a lot of cheaters outside but not all of these resellers know that they do offer a faked product. During my tests only one EBay reseller from Poland did not take the card back or better, he is not active on EBay anymore. So these re-sellers are mostly victims too, have this in mind if you got a faked card(!). I informed some german resellers and mostly they have stopped the auctions just in time and until they verified that the offered product was a fake.

How can you prevent to be a victim, 10 golden rules:

1) Only buy from a “thrusted” reseller being active for years and not only for a few weeks.
2) Buy in a store if possible, than you know were to go.
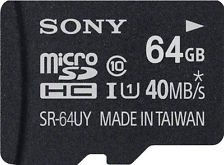
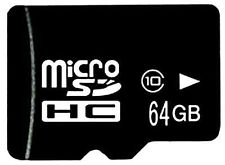
3) There are no “64GB” SDHC Cards by standard (Official SD-Card Standards) and any Card offered as 64GB SDHC Card is a FAKE in general. (Yes.. There are a lot of stupid cheaters around, see pictures below, all from current EBay or Amazon offers!).
sdfake2 sdfake3

4) A Card labeled with a brand doesn’t mean it’s not a fake and this incl. if they are labeled as SDXC card.
5) You will “NOT” get any 64GB SD-Card for 12$ or something around this… In my tests all 64GB Cards sold for less than 35$ or 30€ were fakes, quite easy.. If a reseller tells something different please send me  1000 samples were I can choose one random card of my choice for tests and point to your current online offer. If you offer real 64GB SD-Cards for less these prices in Europe or the US i will provide you free ads on my site! Promised!
6) Until you got the card test it just in time with nonsense data and copy a bunch of data on it (like movies) also verify that the data is not corrupt. Movies are a good sample because you can verify the result very fast. This will take time to fill up the card but this is the safe and best way to test it.
7) Use a wipe tool to “zero out” the full SD-Card.
8) Check the write speed, SDXC cards are much faster than SD or SDHC and the write speed for a SDXC Card in Windows Explorer should be higher than 10MB/s in general, use also “large” files for the tests because small files are written much slower to SD-Cards in general.
9) Don’t buy SD-Cards in online auctions, at a farmers market, a basar or somewhere similar… Iam sorry, but here the risk to get a fake is increddible high.
10) Always pay with credit card or paypal, after you got the SD-Card proceed with a test and block the payment if you got a fake ASAP.
If you follow these rules you should be much saver but still: It’s a billion dollar business to earn “easy” cash in a much safer way for criminals and you can never be save that you will not get a cheap fake.

Cheers
Michael

P.S.: Don’t blame main vendors like SanDisk, Sony, Transcend or other for “cheap” products getting damaged after a few days or weeks and don’t believe if a reseller tells you the device is not compatible for “large” SD-Cards, contact the vendor to check if the card is a original one and/or try an other card. Believe me.. Very often you got a fake and not a “technical” problem with your device or a broken card. Also you can contact the police but this could be a “hard” way to demonstrate this to the officers because cheating with SD-Cards is much more saver than cheating with a high expensive faked watch or a money bill and these guys know that. Do also not believe we’re only talking about one or two percent, if i look at EBay auctions or Amazon offers i would expect between 10% and 30% (or even more) offered online SD-Cards are not what they should be and this a  lot.


Solution: Run a pfsense firewall on Microsoft Hyper-V Server

Friday, February 7th, 2014

Hello Folks,

this one is not IGEL related but maybe intresting, there is a really cool free firewall software called pfsense (http://www.pfsense.org/).

The firewall software is based on free bsd and comes with a lot of cool features but there is one problem… It will not work on Microsoft Hyper-V Servers regarding an issue with the free BSD network drivers but you can fix it. There are some solutions already available but none of same are really working well and/or require some manual actions after boot, so how can we fix it…

Create a new VM in the Microsoft Hyper-V and assign the pfsense ISO file for the installation, make sure to assign only “Legacy” Network Adapters to the VM. The virtual network cards in the VM are named like de0, de1 and so on.

After the installation perform the basic network setup and reboot the VM, the network adapters are not working at the moment so don’t connect to the Management GUI via HTTP. After the reboot open the VM and enter the pfsense console, one virtual network card should have a “working” internet connection! Enter the pfsense shell (Option 8) and type in here:

ifconfig de0 down (repeat this for every network card, like de1)
ifconfig de1 down
ifconfig de0 up
ifconfig de1 up
dhclient de0 (this command is only required for network cards using a DHCP address coming from an other DHCP server, repeat or skip like required)

Now open the HTTP based WebConfigurator coming with pfsense, the network cards should now work until a reboot is performed. Open the System->Packages->Available Packages Menu and install the “Shell Command” Service from here. After this is done open the Menu Services->Shellcmd and add the commands you have entered before in the shell here, keep the order like before and incl. also the dhclient commands if used before. Reboot the VM and everything should work now also together with the Hyper-V, no extra scripts or shell actions are required.

Cheers

Michael